
The Cross Stitch Parking Method, Explained (and How to Never Lose a Parked Thread)
What the parking method is, when it beats cross-country stitching, how to park by row or by block, and how to keep track of every parked needle.
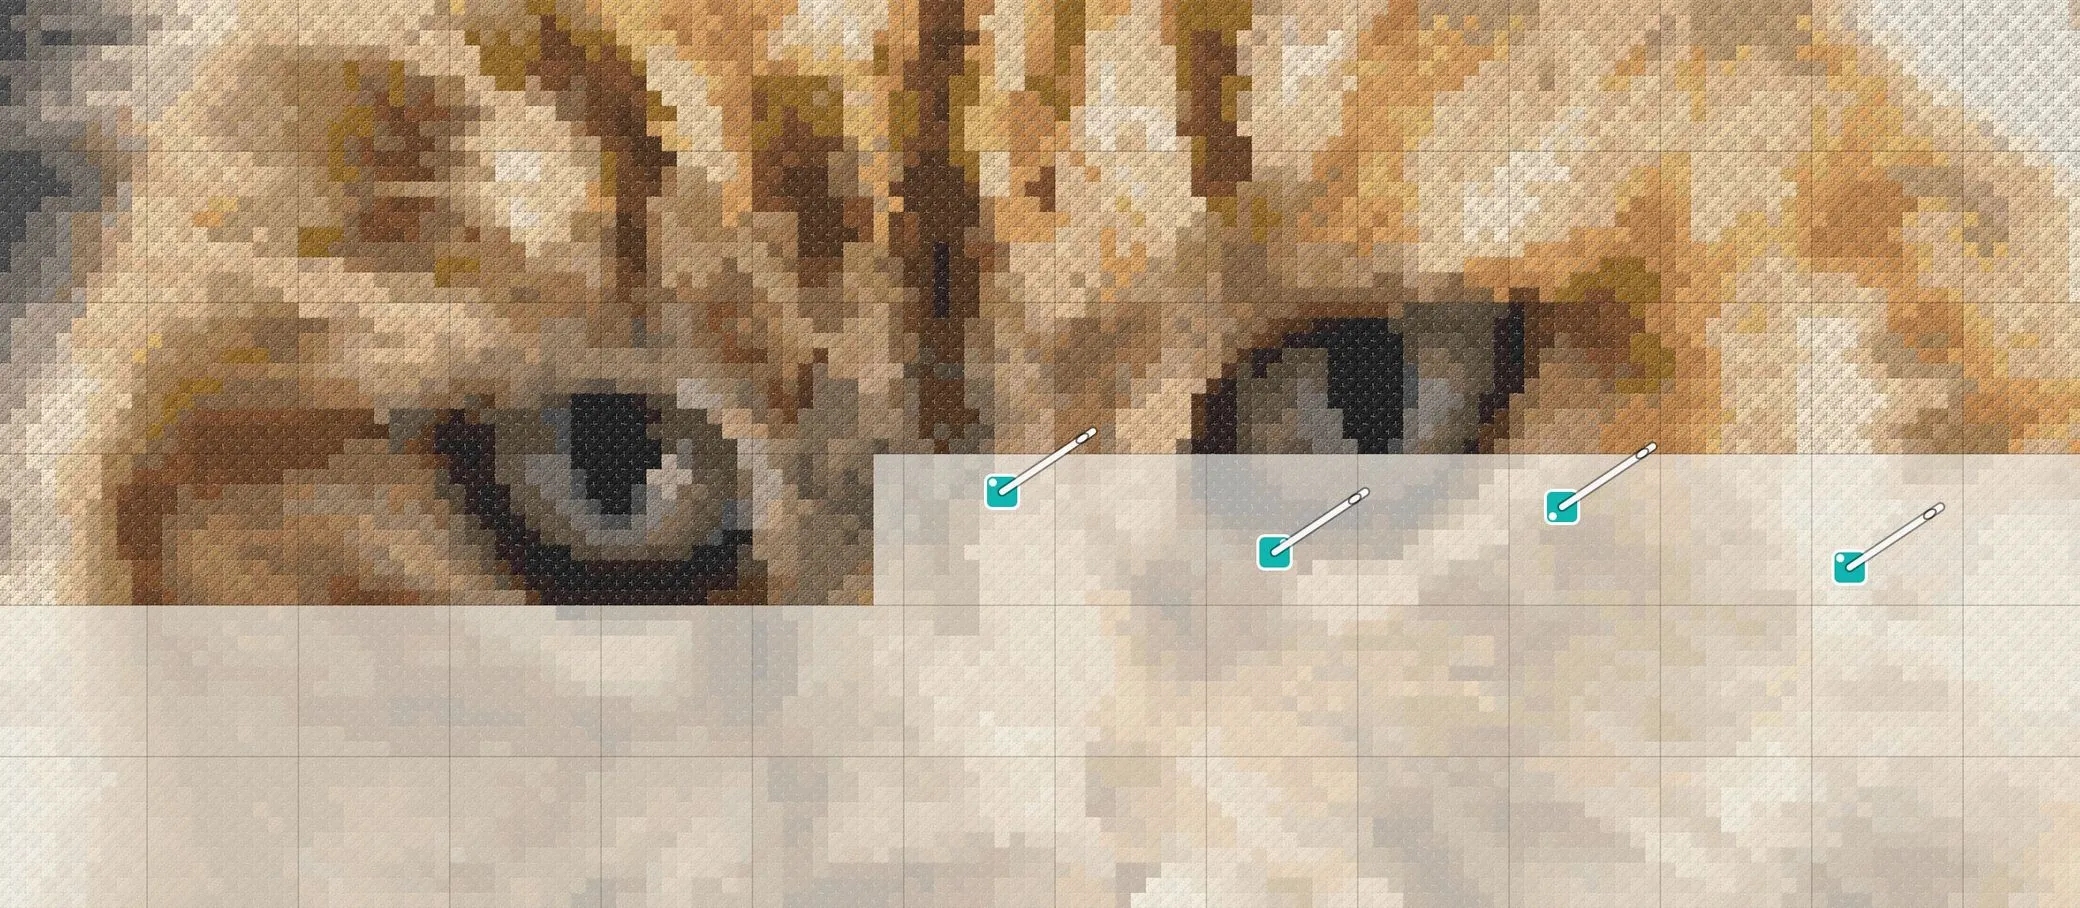
If you have ever looked at a full-coverage chart with 90 colors and thought “where would I even start”, the answer the heavy stitchers give is: park. This guide explains what the parking method is, when it is worth it, how to set it up, and how to stop losing track of thirty threaded needles.
What parking is
Most people learn cross stitch the cross-country way: pick a color, stitch every stitch of that color in the area, move to the next color. It works beautifully on a sampler with eight colors and big shapes.
It falls apart on full-coverage designs. When a chart is a photo or a painting, every 10x10 block might hold fifteen colors, and a single color might appear as one lonely stitch here, two stitches there, and one more forty stitches to the right. Cross-country on that chart means threading and re-threading constantly, counting long empty stretches, and carrying thread across the back where it will show through.
Parking flips the order. Instead of finishing a color, you finish an area. You work one row (or one block) and stitch every color that appears in it, in whatever order is convenient. When the current row has no more stitches of the blue you are holding, you do not end the thread. You bring the needle up in the next stitch of that blue, wherever it is in the next row, and leave it there. The needle is parked, ready and waiting, and you pick up the next color.
Every color in play keeps its own threaded needle. When you reach the parked needle in the next row, it is already in the right place, coming up through the right hole.
When parking pays off
Parking earns its reputation on three kinds of charts:
- Full-coverage designs. Photo conversions, paintings, anything where every cell is stitched. There is no background to skip, and colors are scattered everywhere.
- Confetti-heavy charts. Lots of single stitches of many colors. Parking makes confetti tolerable because you never leave a row until it is complete, so no single stitch is ever forgotten.
- Blended and shaded areas. Skin tones, skies, fur. Adjacent colors are so close that mistakes are invisible until you are two inches past them. Parking keeps you honest one row at a time.
It is not worth it on simple designs. A sampler, a motif with four colors, a piece where one color covers half the fabric: cross-country is faster there and uses less thread. Some stitchers combine the two, cross-country for the big areas and parking for the fiddly ones.
Row parking versus block parking
There are two common rhythms.
Row parking completes one horizontal row of the chart (often ten stitches wide, one block at a time) before moving down. Threads are parked in the next row. It suits charts with strong horizontal shading and stitchers who like a clear finish line every few minutes.
Block parking completes a whole 10x10 block, then moves to the next block. Threads are parked in the next block, which can be to the right or below depending on your route. Blocks make it easy to say “I finished two blocks tonight”, and they match the heavy gridlines printed on most charts. Many stitchers park by row inside a block, then move blocks.
Either way, decide your route before you start: left to right, top to bottom, or column by column. A consistent route is what makes parking predictable.
Setting up
A few practical habits make parking calm rather than chaotic:
- One needle per color, threaded generously. Use lengths you are comfortable with; you will be leaving them parked for a while. A needle minder or a strip of felt clipped to the hoop keeps the idle needles from wandering.
- Park with a consistent corner. Bring the needle up in the corner where you start every cross stitch. If your first leg runs from bottom-left to top-right, park in the bottom-left hole of the next stitch. The corner is the part people forget, and it is the part that makes the parked needle instantly usable when you reach it.
- Park in the next stitch of that color, not just anywhere. The whole point is that the needle is already where the thread is needed next. Parking “somewhere convenient” defeats it.
- Work with the chart in front of you. Parking means constant reading: what colors are in this row, where does each one go next. A chart you can zoom and filter beats a printout here.
- Keep the back tidy. Parked threads run across the back to their next stitch. Short hops are fine; if a color’s next stitch is far away, end the thread instead and start fresh when you get there.
Keeping track of parked threads
This is where parking breaks down for most people. Twenty needles hanging off the fabric, and the question “which one is the 3865 and where was it going” comes up every few minutes. Losing track means pulling the wrong needle, stitching the wrong color, and unpicking.
On paper, the usual fix is to mark the parked position on the chart with a highlighter dot in the corner where the needle sits. It works until the chart is re-printed, the highlighter fades, or the dot ends up under a mark for a completed stitch.
A tracking app can do this properly. In the Knytstudio progress tracker, you tap Park, tap the stitch where the needle comes up next, and record the corner. The parked needle appears on the chart as a dot in that corner, and a Parked threads list shows every parked color with its row and column. When you reach that part of the chart, one tap jumps you to the needle with the right color selected, so the thread you pick up is the thread you need. Stitch the parked cell and the park clears itself, so the list only ever shows needles that are still waiting. Parks sync with your progress, so the tablet on the couch and the phone on the train agree about where every needle is.
The same tracker handles the rest of the parking workflow: mark a whole 10x10 block done in one tap when you finish it, filter the chart to one color to see where the parked needle goes next, and track backstitch outlines at the end. The progress tracking guide walks through all of it.
A short parking checklist
- Pick a route (rows or blocks) and stick to it.
- Thread one needle per color in the current area.
- Finish the area completely before moving on.
- Park each needle in the next stitch of its color, in your usual corner.
- Record where every needle is parked, on the chart or in the tracker.
- Keep hops short on the back; end threads that would travel far.
Parking has a learning curve of about one evening. After that, full-coverage charts stop being intimidating and start being a sequence of small, finished areas. That is the real appeal: not speed, but the feeling of a row done, then another, then a block, on a piece that would otherwise take a year to feel like progress.
Frequently asked questions
What is the parking method in cross stitch?
Parking means stitching a small area at a time, usually one row or one 10x10 block, in every color that appears there. When a color runs out in that area, you bring the needle up in the next stitch of that color further along and leave it there, parked, until you reach it. Each color keeps its own threaded needle.
Is parking faster than cross-country stitching?
For full-coverage and confetti-heavy charts, usually yes. You stop hunting for the next stitch of a color across the whole chart and never count long gaps. For simple designs with big blocks of one color, cross-country is faster and uses less thread.
How many needles do you need for parking?
One threaded needle per color in play in the current area, typically 10 to 40 on a full-coverage piece. Many stitchers keep a needle minder or a strip of felt at the edge of the hoop for the parked needles.
Which corner should the needle come up in when parking?
The corner where you start each cross stitch. If you stitch the first leg from bottom-left to top-right, park with the needle coming up in the bottom-left hole of the next stitch. Consistency matters more than the specific corner.
How do I keep track of parked threads?
On paper, stitchers mark parked positions with a highlighter or a dot in the corner. In a tracking app, park the thread on the chart itself: Knytstudio marks the parked stitch and the corner, lists every parked thread with its row and column, and jumps you back to it with one tap.