Creating Patterns
How to build your own amigurumi shapes
Make your own amigurumi pieces in 3D: shapes from their size, rounds in crochet notation, sewing, joined legs and sliders, with the pattern written for you.
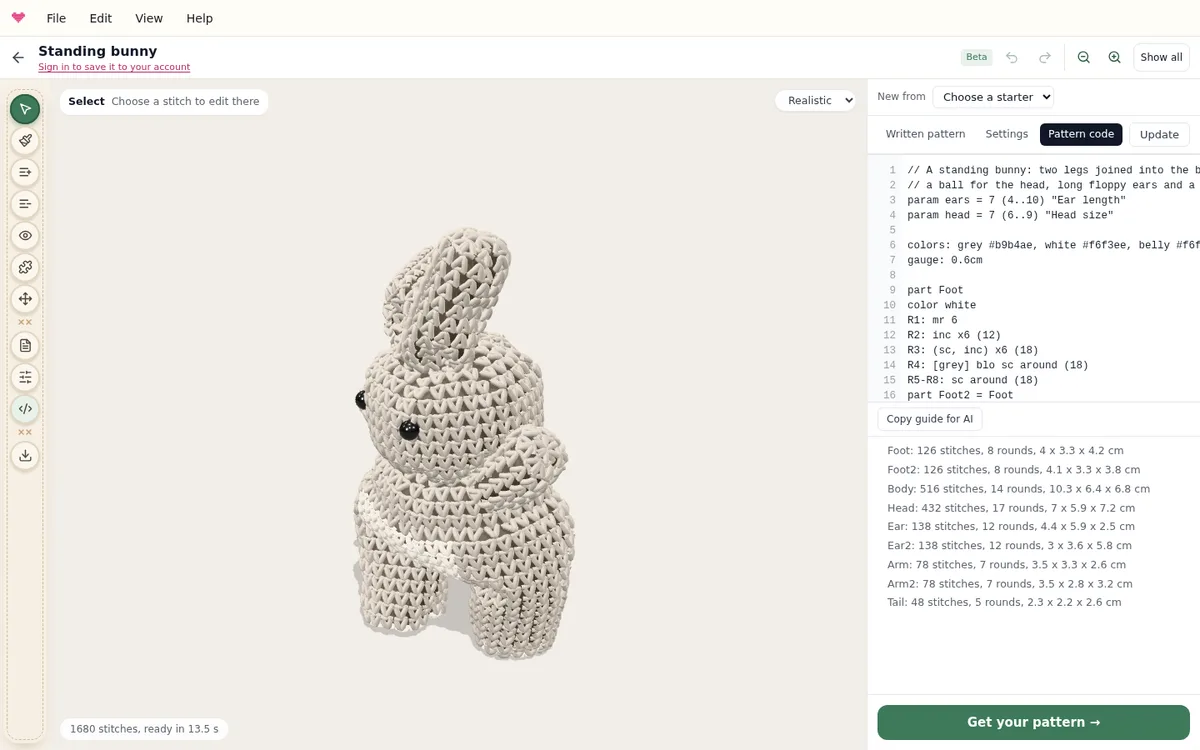
When no starter is close to the toy you have in mind, build the pieces yourself. In the amigurumi designer, a design is its pattern code: ordinary crochet notation plus a few lines for pieces, colours and sewing. Open the Pattern code tab, change it, press Update, and the toy and the written pattern follow.
The quick way: add a piece by clicking
For ears, arms, legs, tails, snouts, wheels, wings, horns and balls you do not need any code. Choose Add a piece, pick the piece above the toy and click where it should be sewn on. Move a piece picks it up again and sews it on where you click next. Each piece is added to the code for you.
A piece from its size
Describe a simple piece by its size and the designer works out the rounds for your yarn:
| Line | Makes |
|---|---|
ball 7cm | a ball 7 cm across, closed |
egg 6cm 8cm | 6 cm across and 8 cm tall, narrower at the top |
tube 3cm 6cm | 3 cm across and 6 cm long, open at the end: arms, legs, necks, tails |
cone 4cm 6cm | a point widening to 4 cm across over 6 cm: horns, beaks, hats, pointy ears |
disc 5cm | a flat circle 5 cm across: wheels, soles, flat ears |
part Head
color tan
ball 7cm
part Arm
color tan
tube 2.5cm 5cm
part Arm2 = Arm
sew Arm.Rlast -> Head.R50% s25%
sew Arm2.Rlast -> Head.R50% s75%
Every piece starts with part and a name, and color sets its yarn. part Arm2 = Arm makes a second, identical arm. Change the yarn in Settings and a shape keeps its size: the stitch counts change instead.
Rounds in crochet notation
For any other piece, write the rounds the way a pattern does:
part Body
color cream
R1: mr 6
R2: inc x6 (12)
R3: (sc, inc) x6 (18)
R4-R7: sc x18
R8: [brown] sc x6, [cream] sc x12
R9: (sc, dec) x6 (12)
R10: dec x6
close
mr is the magic ring, inc and dec the increase and the invisible decrease, hdc, dc and tr the taller stitches, and blo or flo work a round in the back or front loops. A colour in square brackets changes yarn in the middle of a round. The count in brackets at the end is checked: when a round does not make the stitches you wrote, the list under the panel says which line is wrong.
Flat pieces are worked in rows (part Ear rows), and R0: ch 8 starts an oval around a chain, as for a car body or a foot.
Sewing and eyes
sew Arm.Rlast -> Body.R12 s9 sews the last round of the arm on around stitch 9 of round 12 of the body. Stitch 1 is at the centre back, so in a round of 36, stitch 18 faces the front and stitches 9 and 27 are the sides. Rlast is a piece’s last round and R50% the round halfway up, so you do not have to count. eye Head.R8 s15 10mm places a safety eye.
Legs joined into one body
Standing toys start with the legs: crochet both, join them with a few chains and work the body up around both, with no seam between the legs and the body.
part Leg
R1: mr 6
R2: inc x6 (12)
R3: (sc, inc) x6 (18)
R4-R8: sc around (18)
part Leg2 = Leg

part Body
R0: join Leg.Rlast, ch 3, Leg2.Rlast (42)
R1-R6: sc around (42)
The written pattern spells the join out in words. The standing bunny starter is built this way.
Sliders of your own
A param line becomes a slider in Settings: param ears = 7 (4..10) "Ear length". Use it in the code in curly brackets, such as R4-R{ears}: sc around or ball {size}cm, and the toy reshapes as the slider moves.
Let an AI write it
Press Copy guide for AI under the code. It copies the whole stitch language with your current code, ready to paste into ChatGPT, Claude or another assistant. Ask for a hedgehog or a little house, paste the answer back in and press Update. The checker points out counts that do not add up, so the assistant can fix them.
Continue with colour changes and stripes, yarn, gauge and size, or the designer guide.
Try it yourself
The Knytstudio editor is free to use in your browser. No install, no signup needed to start.
Open the editor